Deploying a Cloud native .NetCore app on Kubernetes Cluster
Kubernetes (K8S – 8 letters between K and S) is a container orchestration service which was invented by Google and later opensourced it for general public usage. Kubernetes allows you to effectively manage and orchestrate your cloud resources / nodes (EC2 (elastic compute cloud) as Amazon calls it or VMs as Azure calls it or as Compute Engine as Google calls it). Kubernetes allows you to effectively deploy and manage scalable and highly available containers holding your applications.
A basic Kubernetes setup is to create a Kubernetes Cluster within your Cloud environment and configure it specific to your needs. A Cluster is nothing but a combination of VMs/nodes that can hold individual containers. Some of these a classified as Master nodes and others as Worker nodes. Master nodes control and manages the creation and management of worker nodes as you create, manage scale your containers.
This article assumes that you have some knowledge about how Cloud systems work and has deployed some of your Cloud native apps on a container repository such as Docker. In this article we are going to see how to create a Kubernetes Cluster from scratch and how to deploy your app. container as a workload on it. Google Kubernetes Engine is one of the leading Cloud providers that offers state of the art Kubernetes service, and you can create a free account with some insurance of your Credit Card.
Login to your Google account and go to cloud.google.com. Click on ‘Free’ option to create your cloud account. You will need a credit card but will give you $300 credit to learn and use it for about 30 days. Once you create the account, you will see below welcome message –
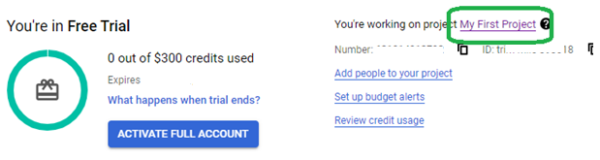
Click on ‘My first Project’ to start creating your first Kubernetes cluster. This will take you to the main dashboard of your Cloud account. Search for Kubernetes as shown below –
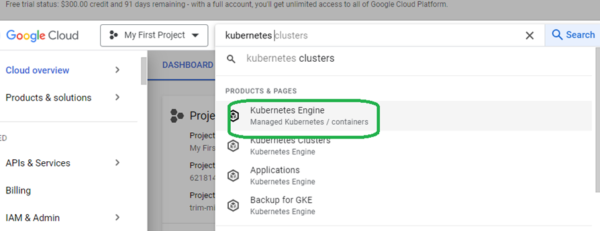
Search for Kubernetes Engine and select ‘Enable API’ as shown below –
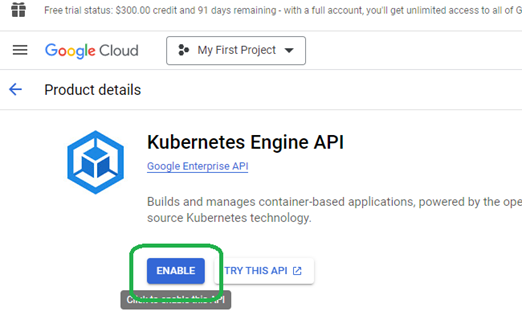
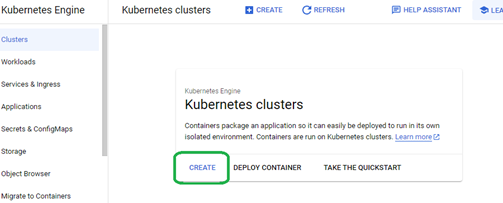
Click ‘Create Cluster’ –
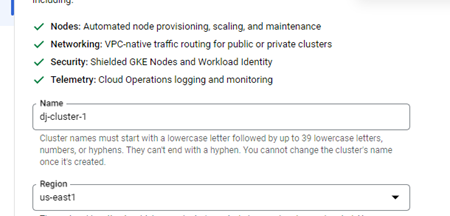
Name your cluster and select the region –
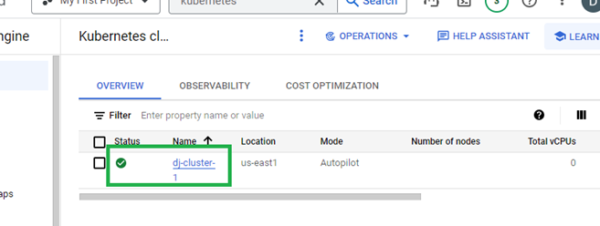
Click create and it takes about 10-15 mins for GKE (Google K8s engine) to create it. Once its created it will show up as below –
You can also use the native gcloud ‘container clusters create’ command (specify your cluster name and the zone as appropriate) in the cloud shell as below to create a cluster –
deepeshjoseph@cloudshell:~ (trim-mile-393018)$ gcloud container clusters create dj-cluster-1 –zone us-central1-c
Default change: VPC-native is the default mode during cluster creation for versions greater than 1.21.0-gke.1500. To create advanced routes based clusters, please pass the --no-enable-ip-alias flag
Deploying your Docker application containers on Kubernetes Cluster
The purpose of creating Google Kubernetes cluster or in any vendor environment is to host your application container and scale it up as you need fit. Now what we are going to do is to go through a live session deploying and exposing two of the application containers that we created in some previous articles (See my previous articles on creating and running Docker application containers) as Workloads (official name for K8S services or application container) on our Google Kubernetes cluster. Along the way, we will be using the command line tool or the Cloud Shell available at the Google K8S control panel. Click ‘Connect’ as shown below to get the command for connecting to your cluster –
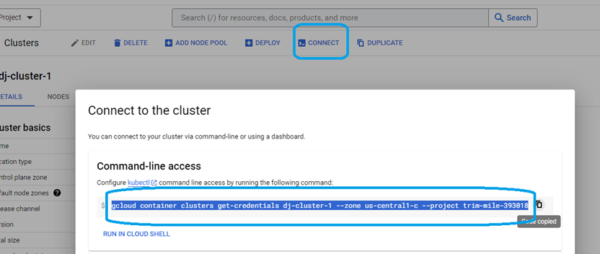
Once you copy it open up the Cloud Shell to run commands to connect to your K8S cluster and create load the application containers and later expose it as load balanced service.
On top right of your Google console, click on ‘Activate Cloud Shell’ to open the Cloud Shell.
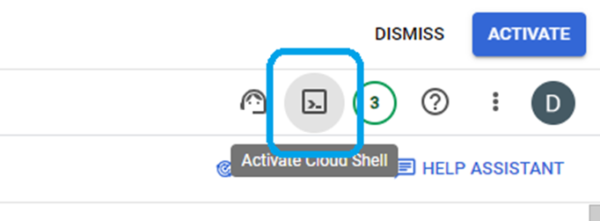
The cloud shell should open up at the bottom as shown below –

We use the command line tool called ‘kubectl’ to interact with the Google Cloud shell. In our example, we are going to load two Docker containers that we created in previous exercise on to our K8S cluster.
First, connect to the K8S cluster by issuing below command (Paste the command that you copied in the previous step)–
gcloud container clusters get-credentials dj-cluster-1 --zone us-central1-c --project trim-mile-393018

You are now connected to the K8S cluster and now you can start issuing commands to deploy and manage your containers. If you haven’t already, please make sure you have your sample Docker application images ready for deploying. In my case, I have a sample .NetCore app in my Docker application image repository, ready to be deployed.
Deploying a .NetCore app on K8S cluster
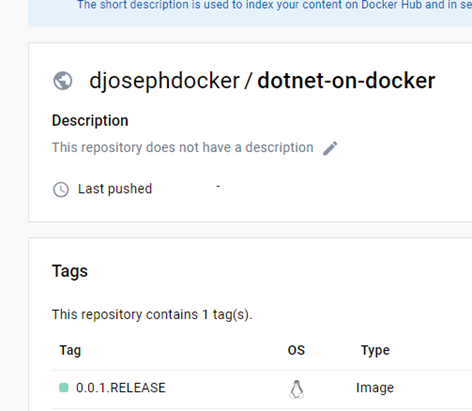
First make sure your application image with the correct release tag is available on your Docker repository as shown below –
Now issue below command to deploy the Docker image on to your K8S cluster –
kubectl create deployment dotnet-on-docker --image=djosephdocker/dotnet-on-docker:0.0.1.RELEASE

Issuing the above command will create the K8S workload and deploy your Docker image and activate it on the pod.
Next step is to expose your deployed on the required port so its available for use. Issue below command –
kubectl expose deployment dotnet-on-docker --type=LoadBalancer --port=80

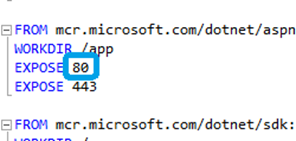
Remember to match the port# with the same that you used in your Docker file, otherwise, the app wont load (learned this hard way)–
Once you issue above commands you can verify your container deployed on the Cloud Console under Workload as shown below. Click on the Workload (‘dotnet-on-docker’) name to see the details active version, managed pod and the service details. As you can see, your active docker repository image is being linked and deployed on to the active K8S pod –
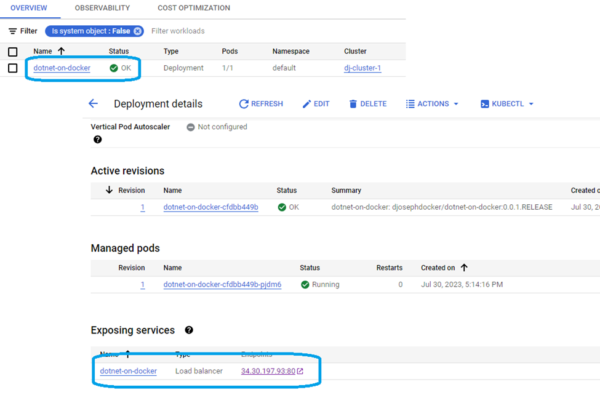
Now comes the fun part to test your app. Click on the above IP link which will open up your app. running on your active K8S cluster!
You have officially deployed your first cloud native app residing on your Docker repository on to your live Kubernetes cluster. You can extend this to any scenarios of Cloud app creation. Enjoy!
[Remember to close out your Google K8S cluster before the trial period ends.]